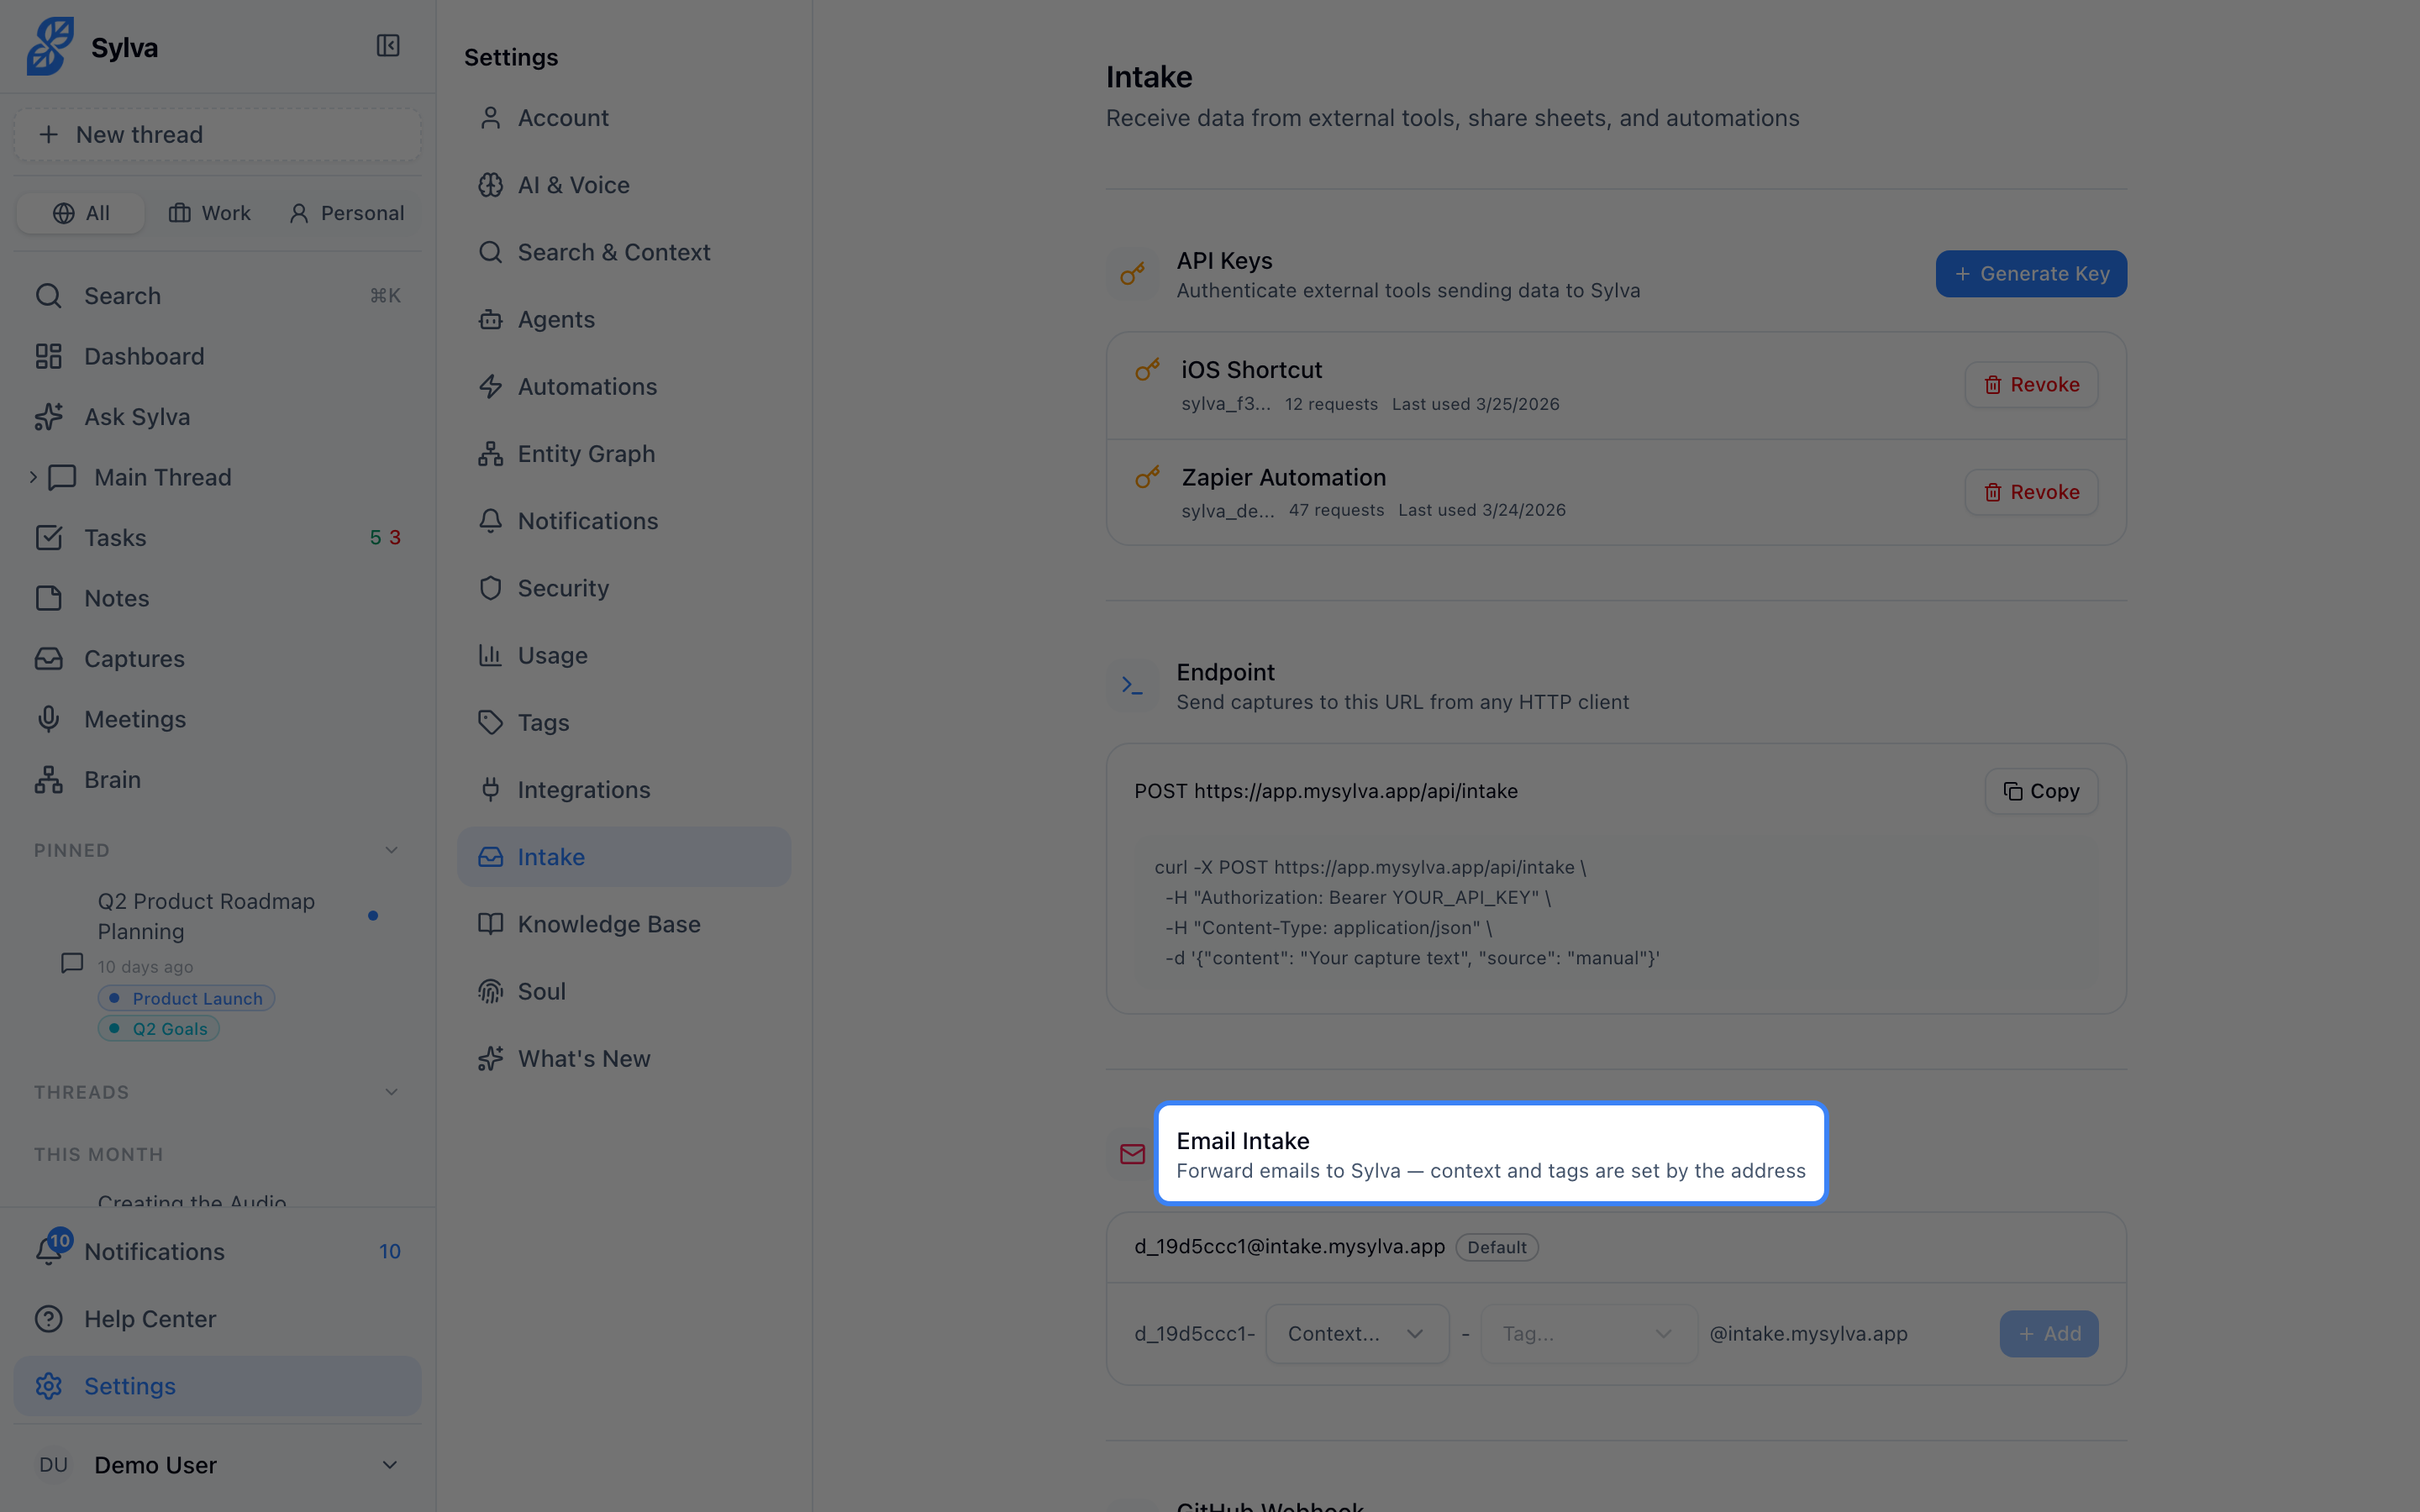
Email Intake gives you one or more dedicated email addresses you can forward messages to — each one automatically captures the email into Sylva with the right context and tags already applied, so you spend zero time organizing.
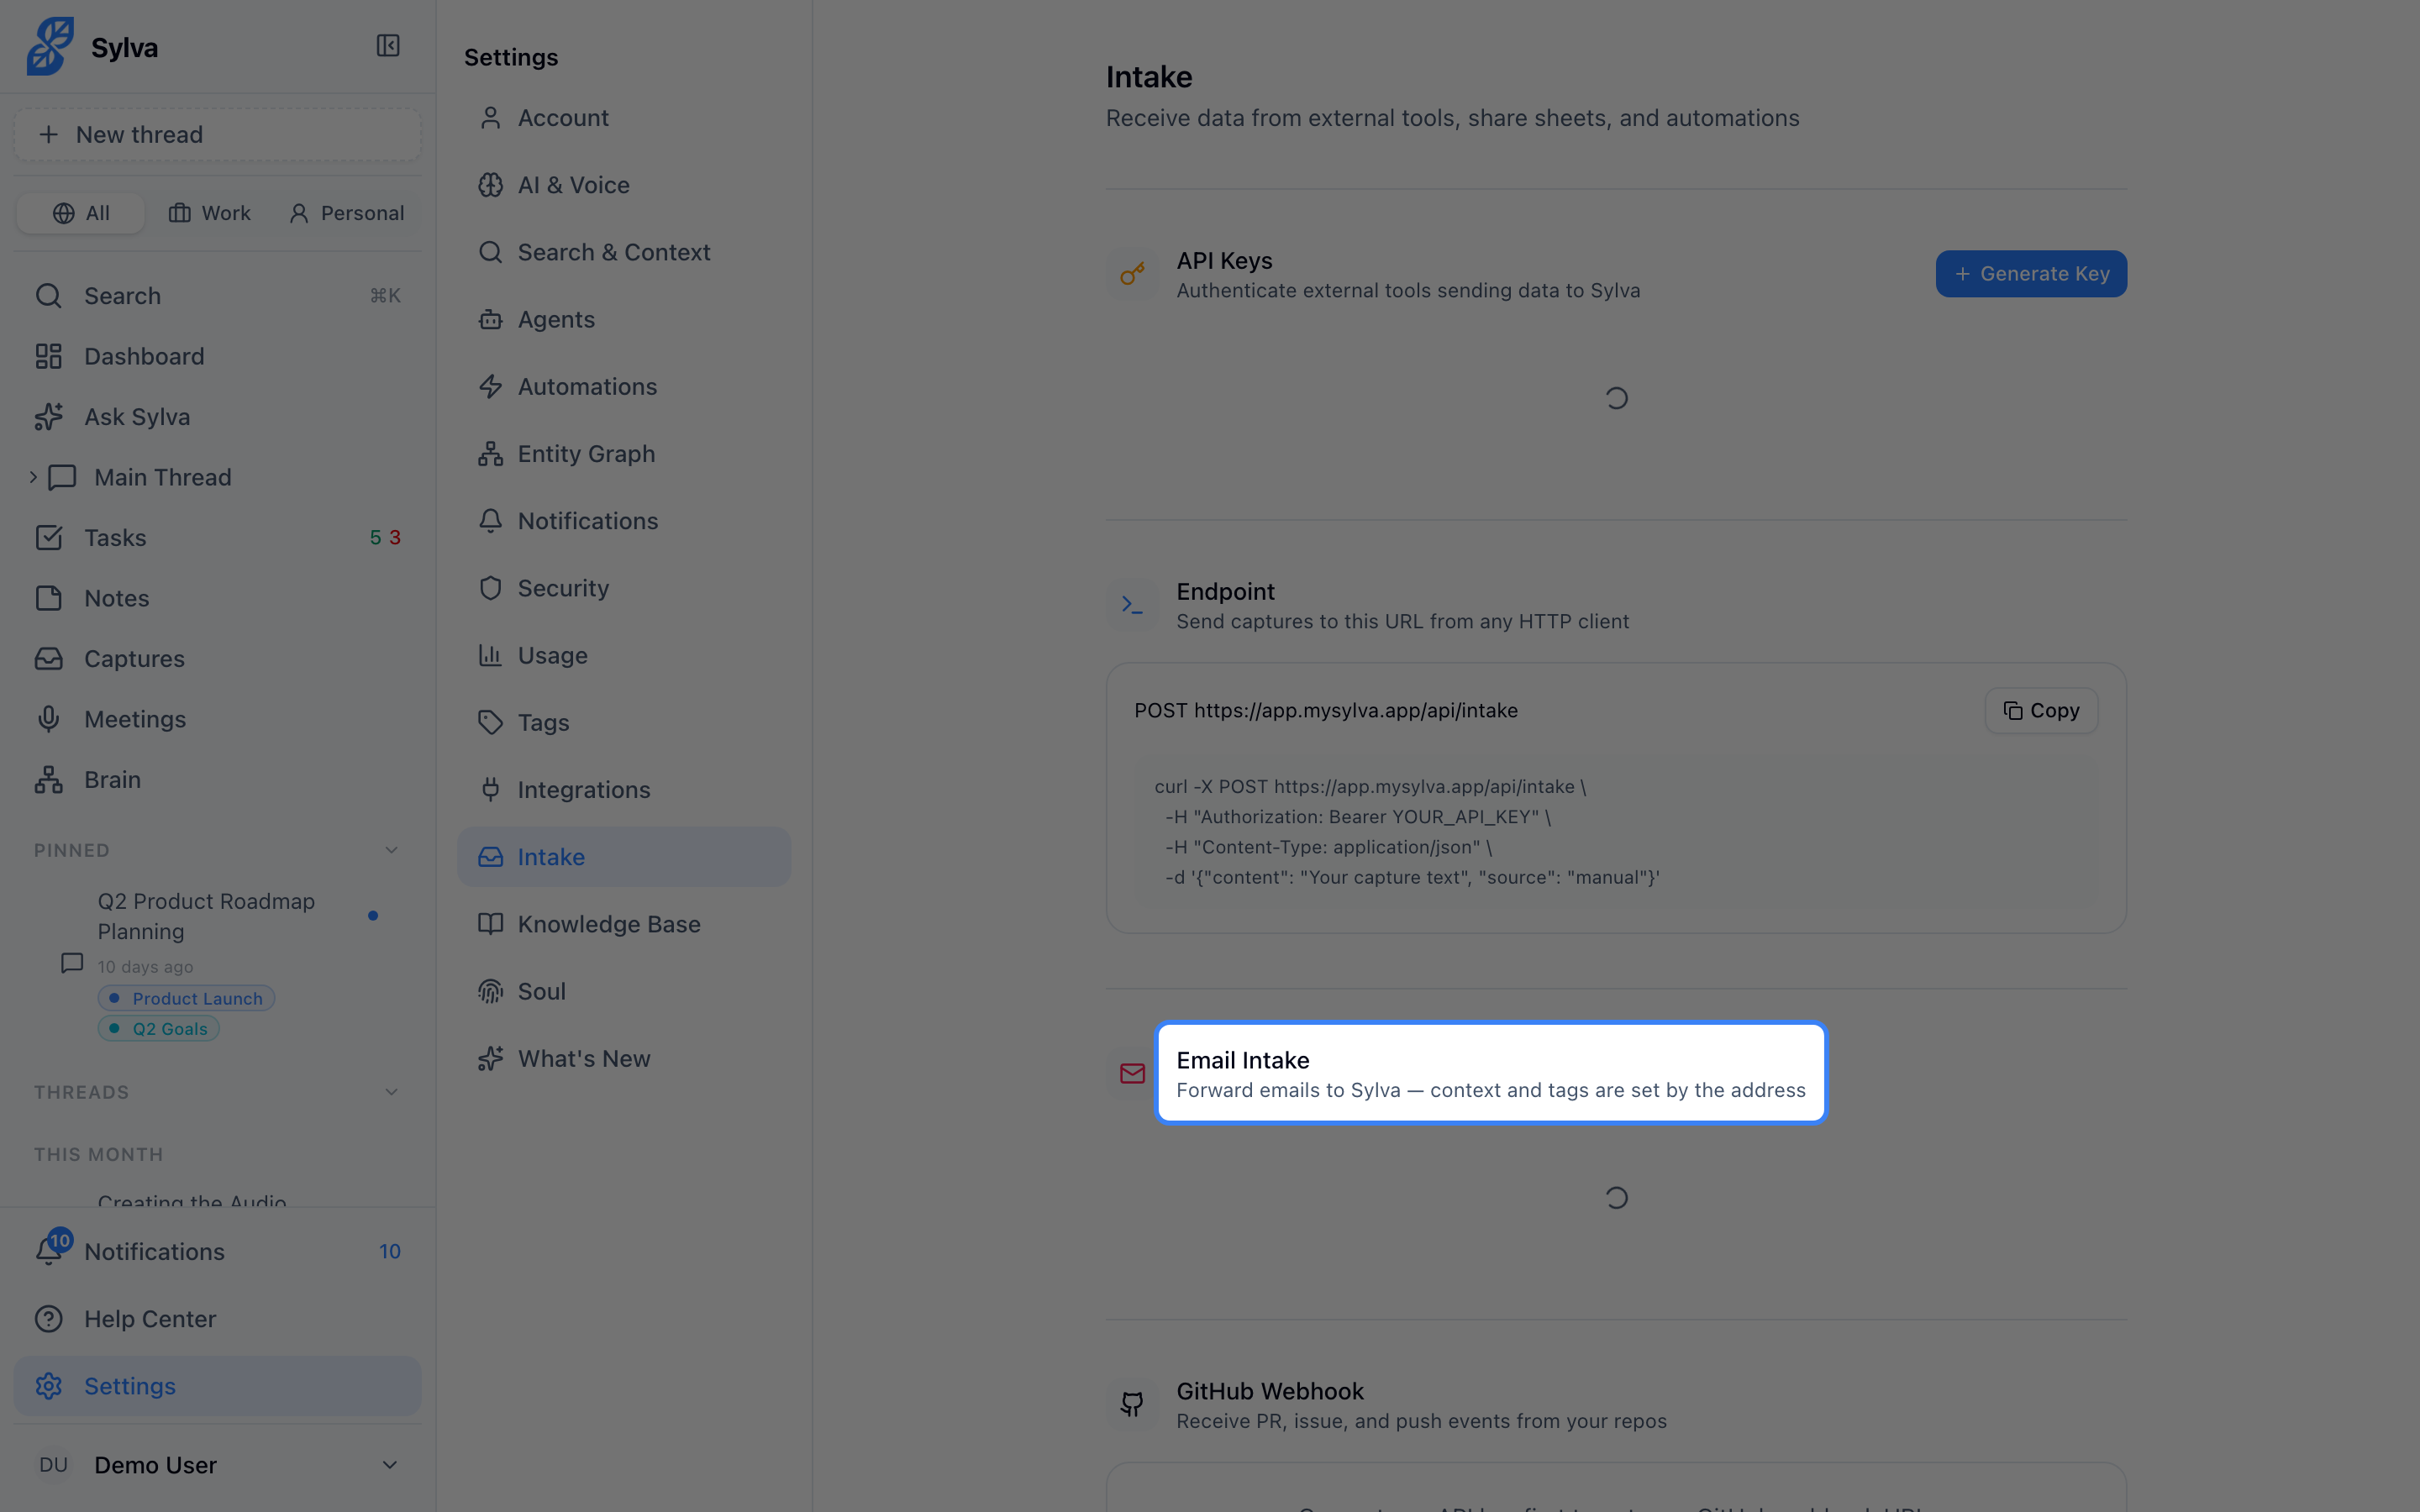
How It Works
Every forwarded email lands in Sylva as a capture, just like messages from the Chrome Extension or meeting transcripts. The address you forward to determines which context (Work or Personal) and which tag the capture receives. No rules to configure after the fact — the routing is baked into the address itself.
Email attachments are preserved too. They appear as collapsible accordion items nested under the parent email capture, so you can expand and review them without leaving Sylva.
Your Base Address
The first time you visit Settings > Intake, Sylva auto-generates a base intake address for you. It looks like this:
This is your catch-all address. Anything forwarded here arrives as a capture with no context or tag — useful when you want to get something into Sylva quickly and organize it later.
The base address cannot be deleted. It's always available as your fallback.
Creating Context-Specific Addresses
To have emails automatically land with the right context and tag, create a context-specific address:
- Scroll to the Email Intake section on the Settings > Intake page
- Click the button to add a new address
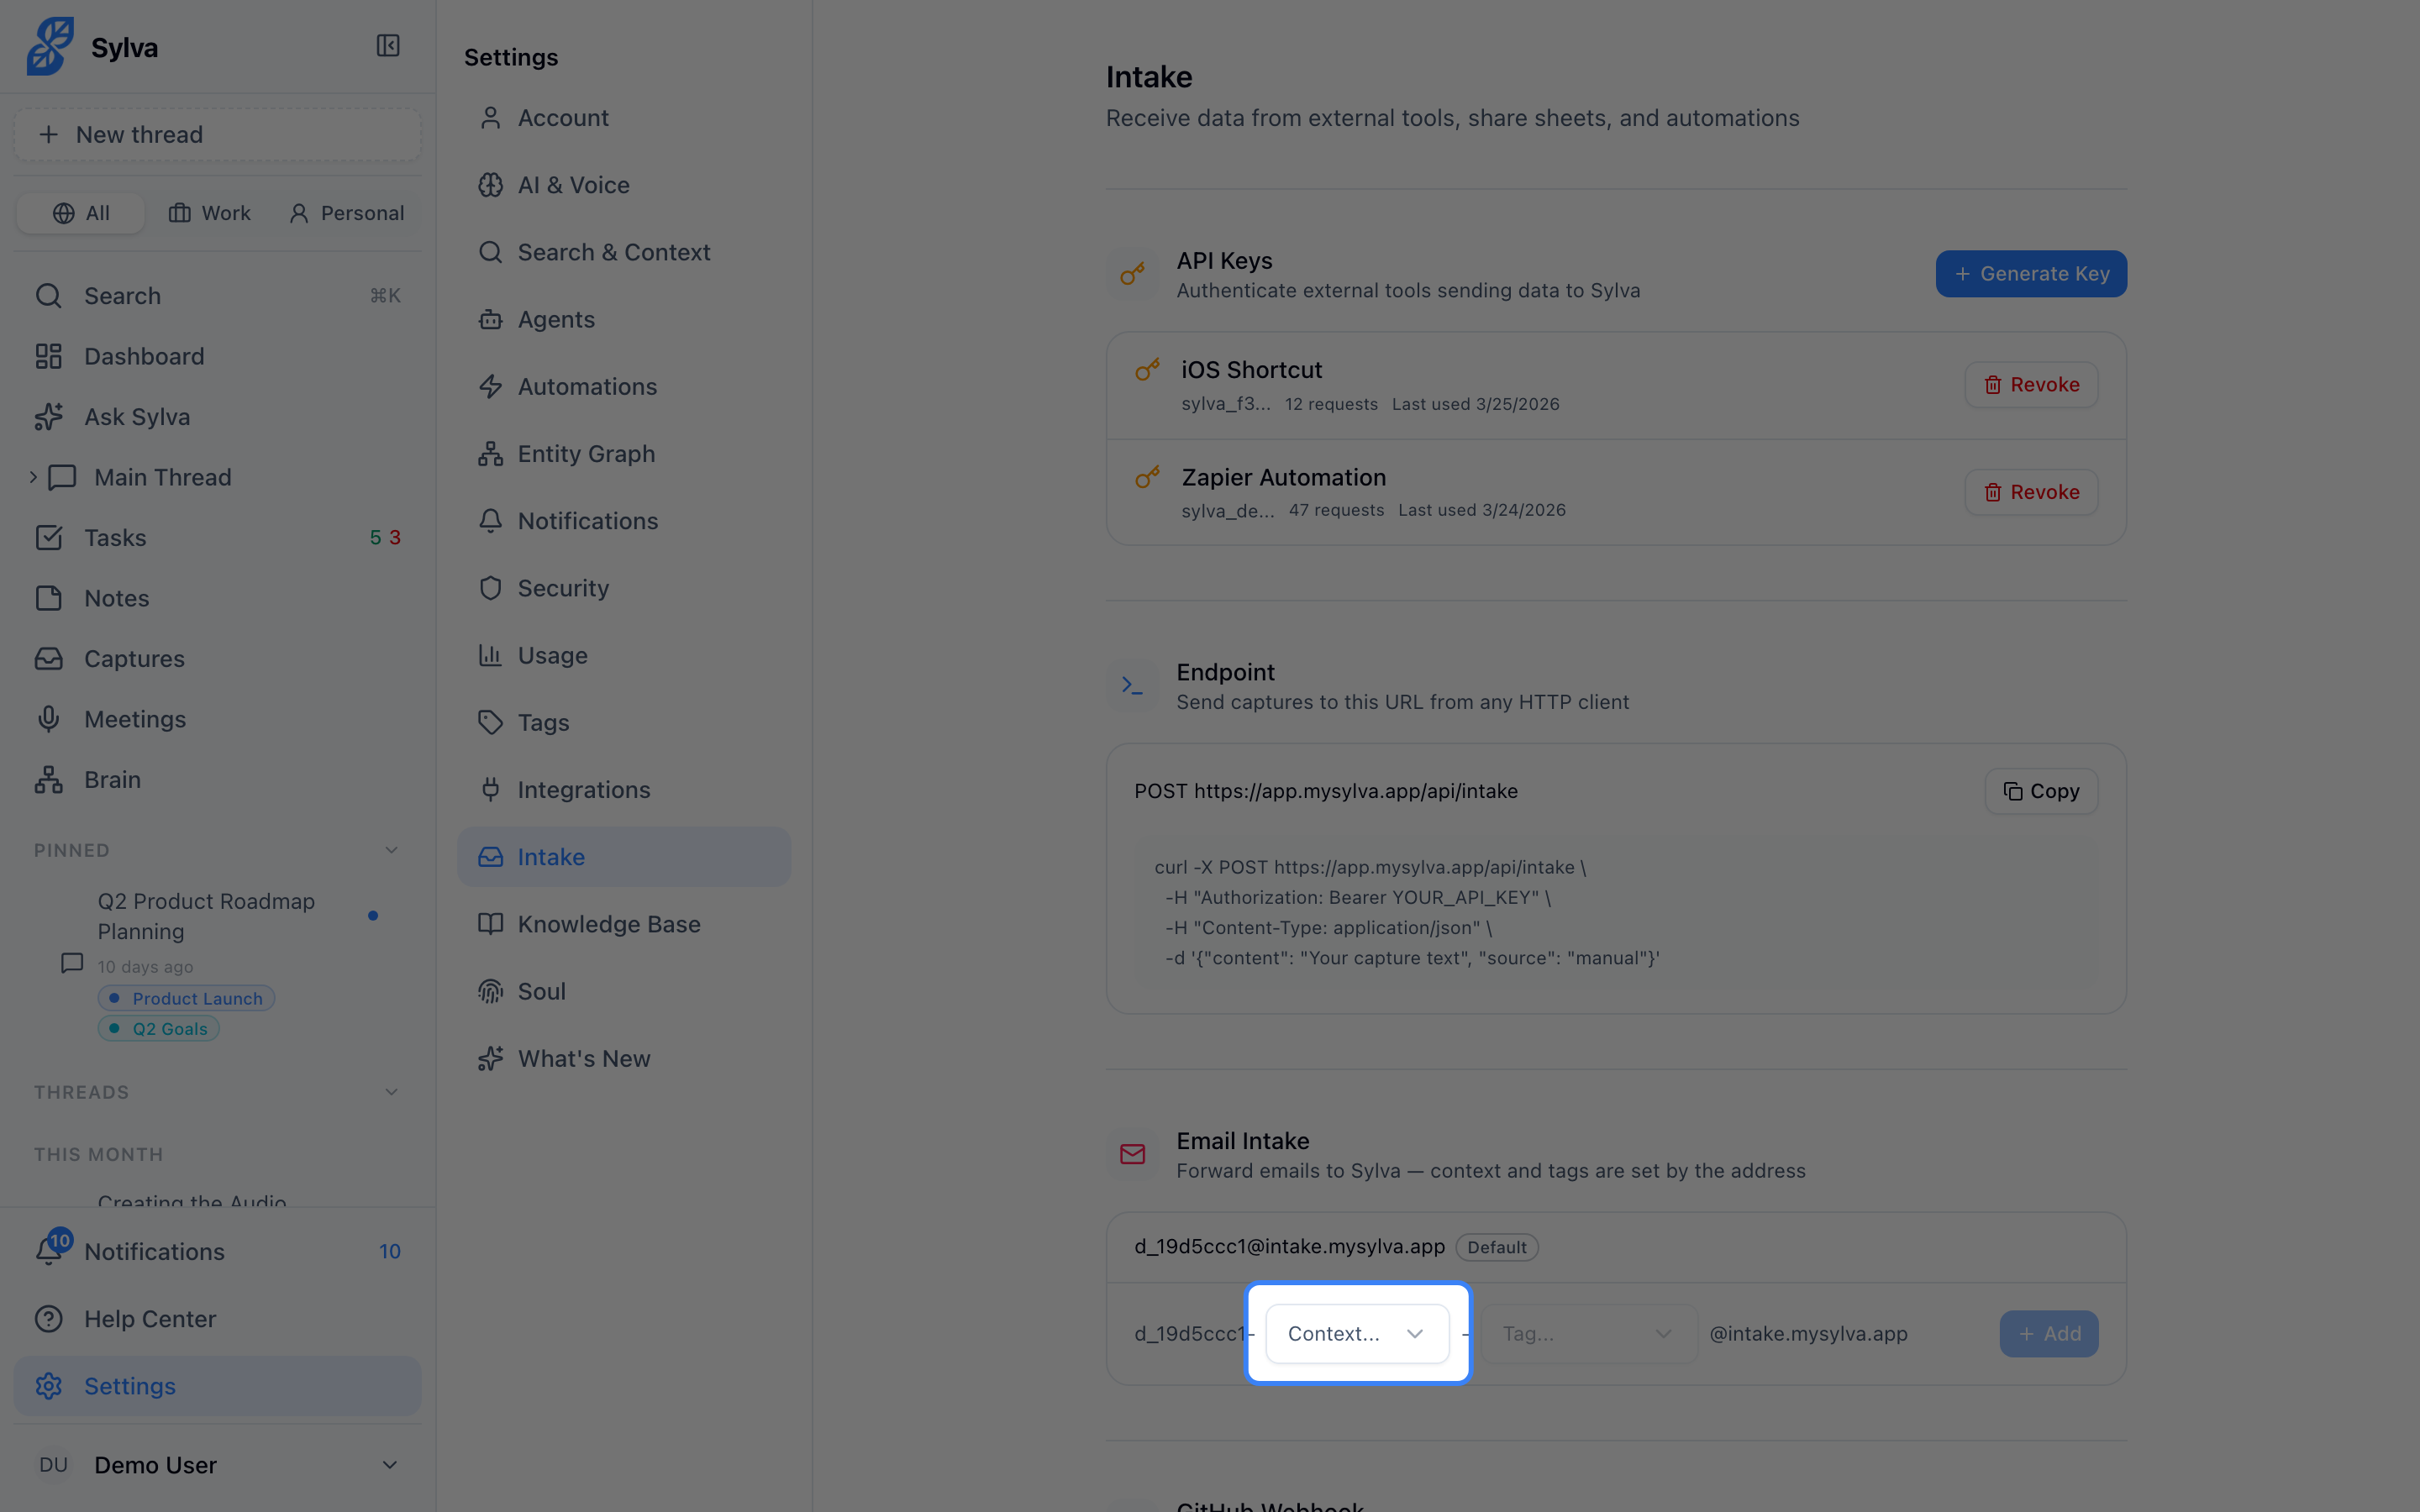
- Choose a context from the dropdown — Work or Personal
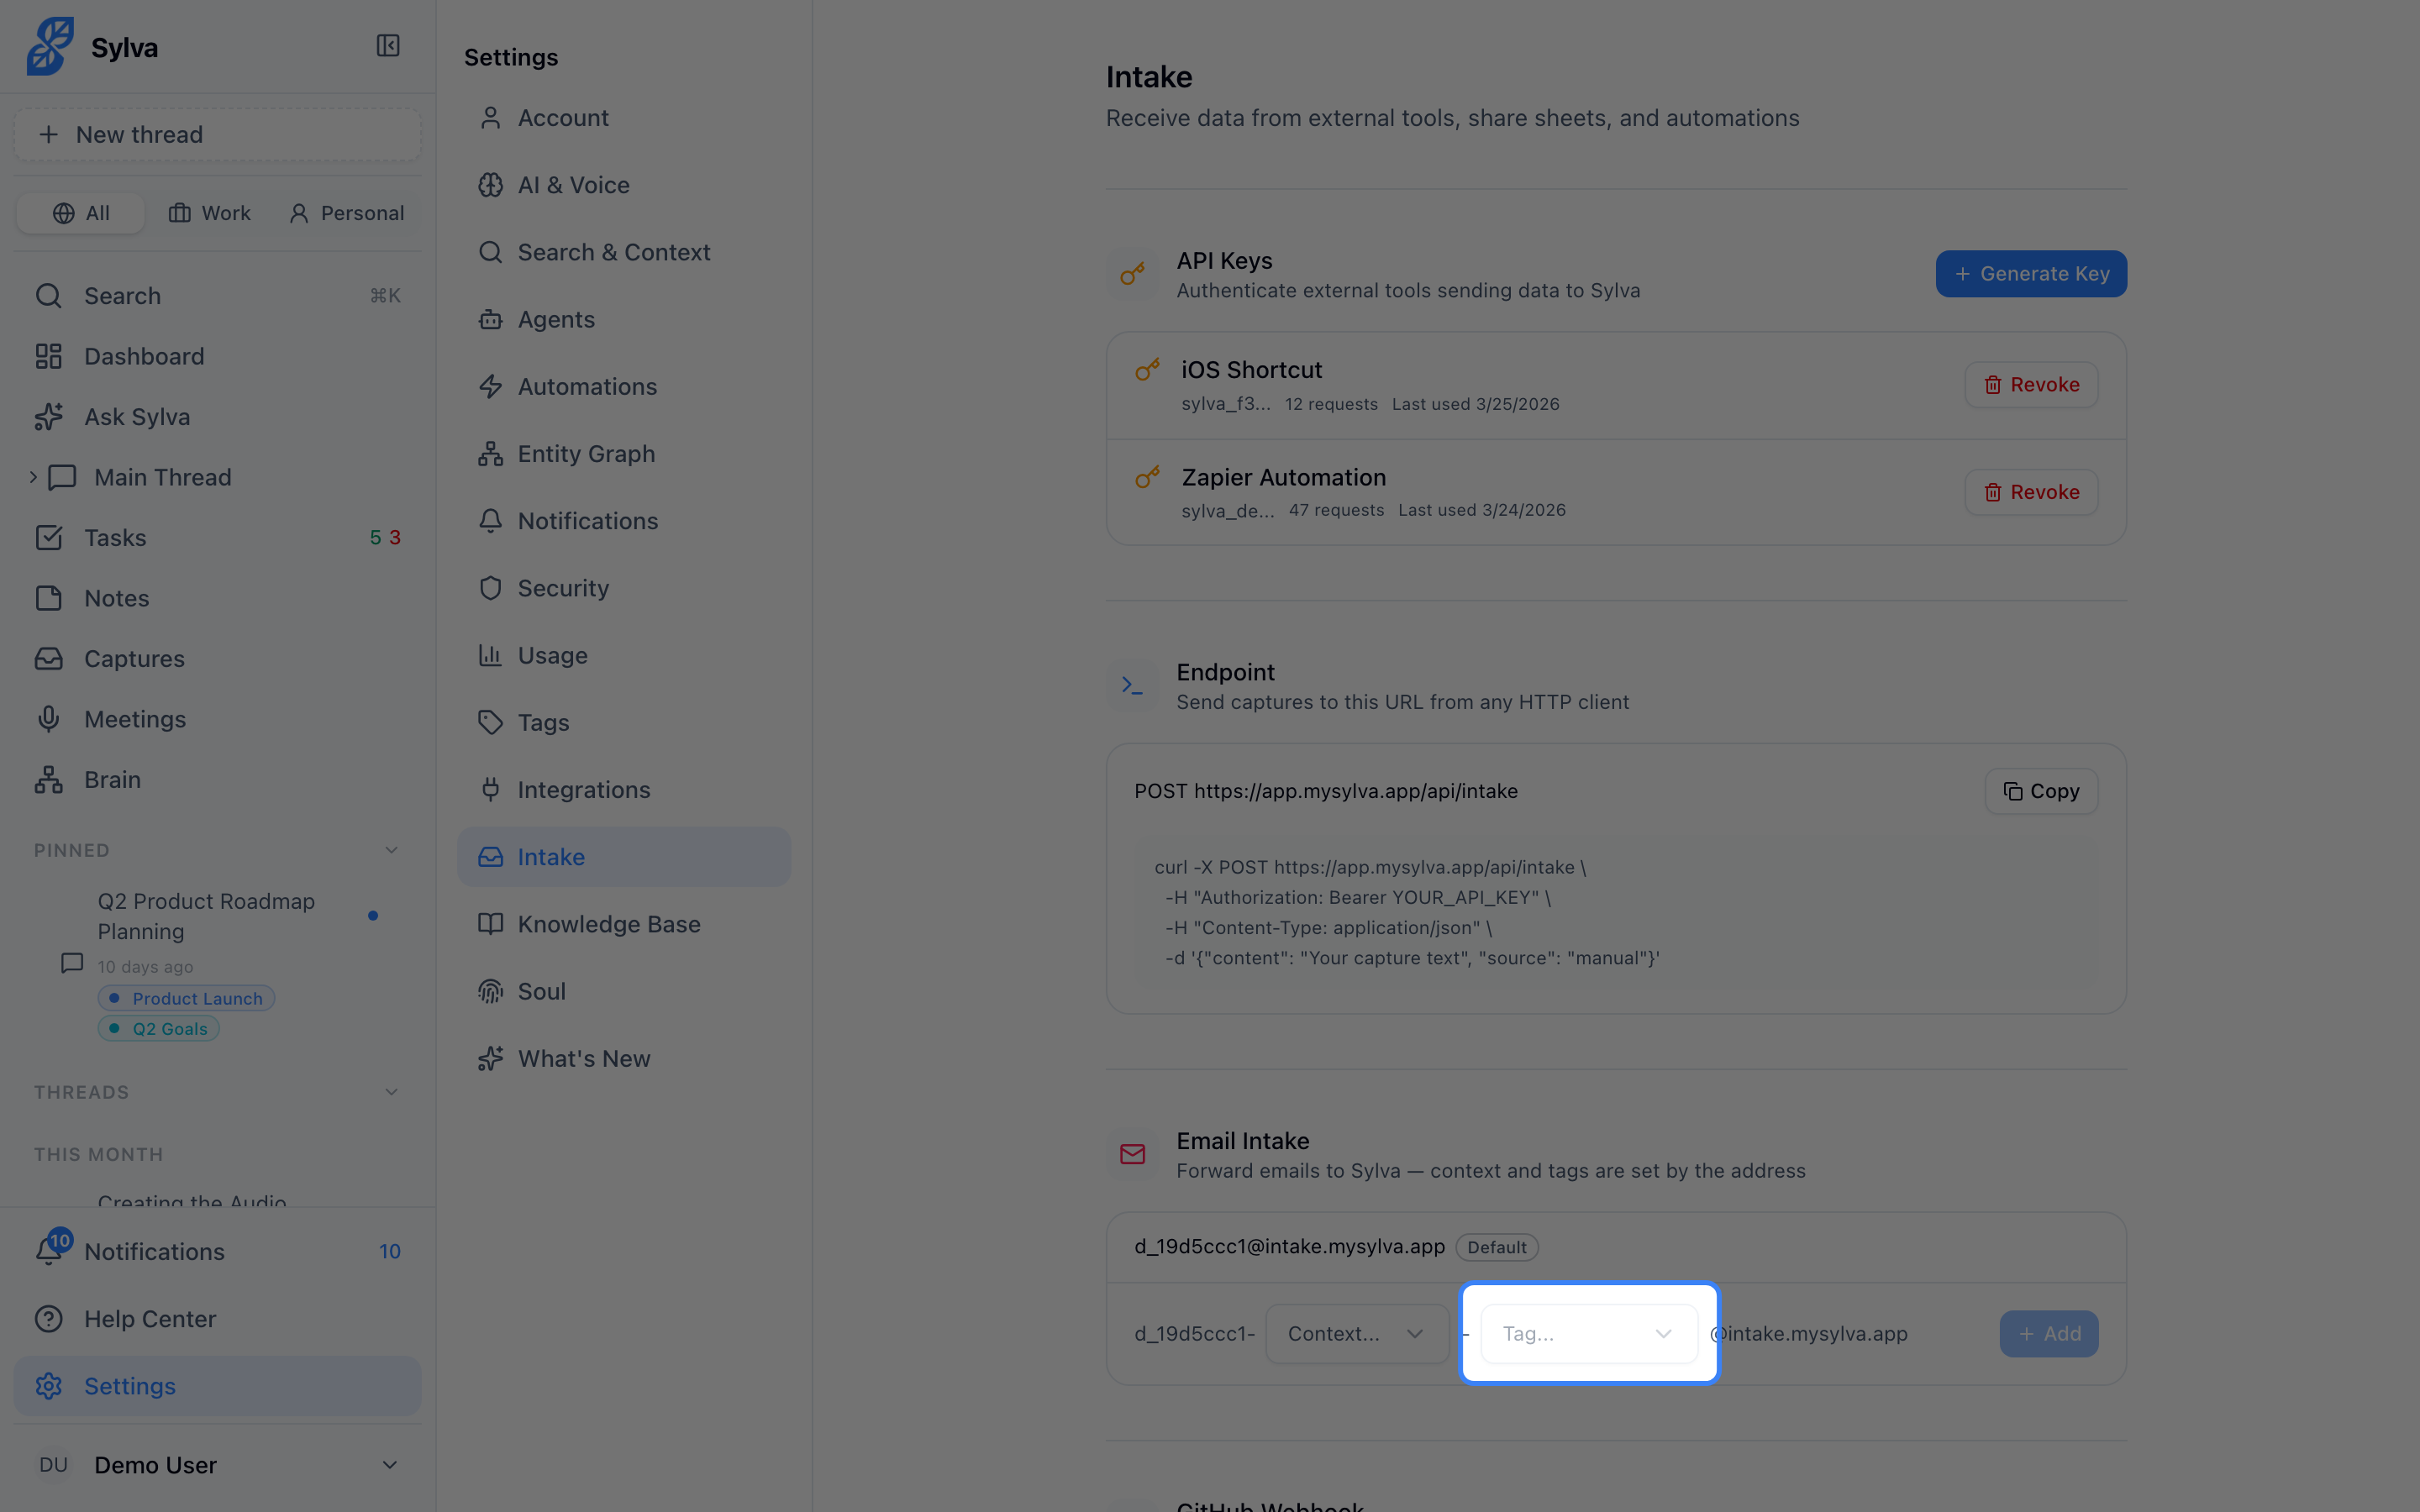
- Optionally, select a tag from the tag dropdown — this list filters to show only tags that belong to the context you selected (plus any tags set to "all")
- Confirm to create the address
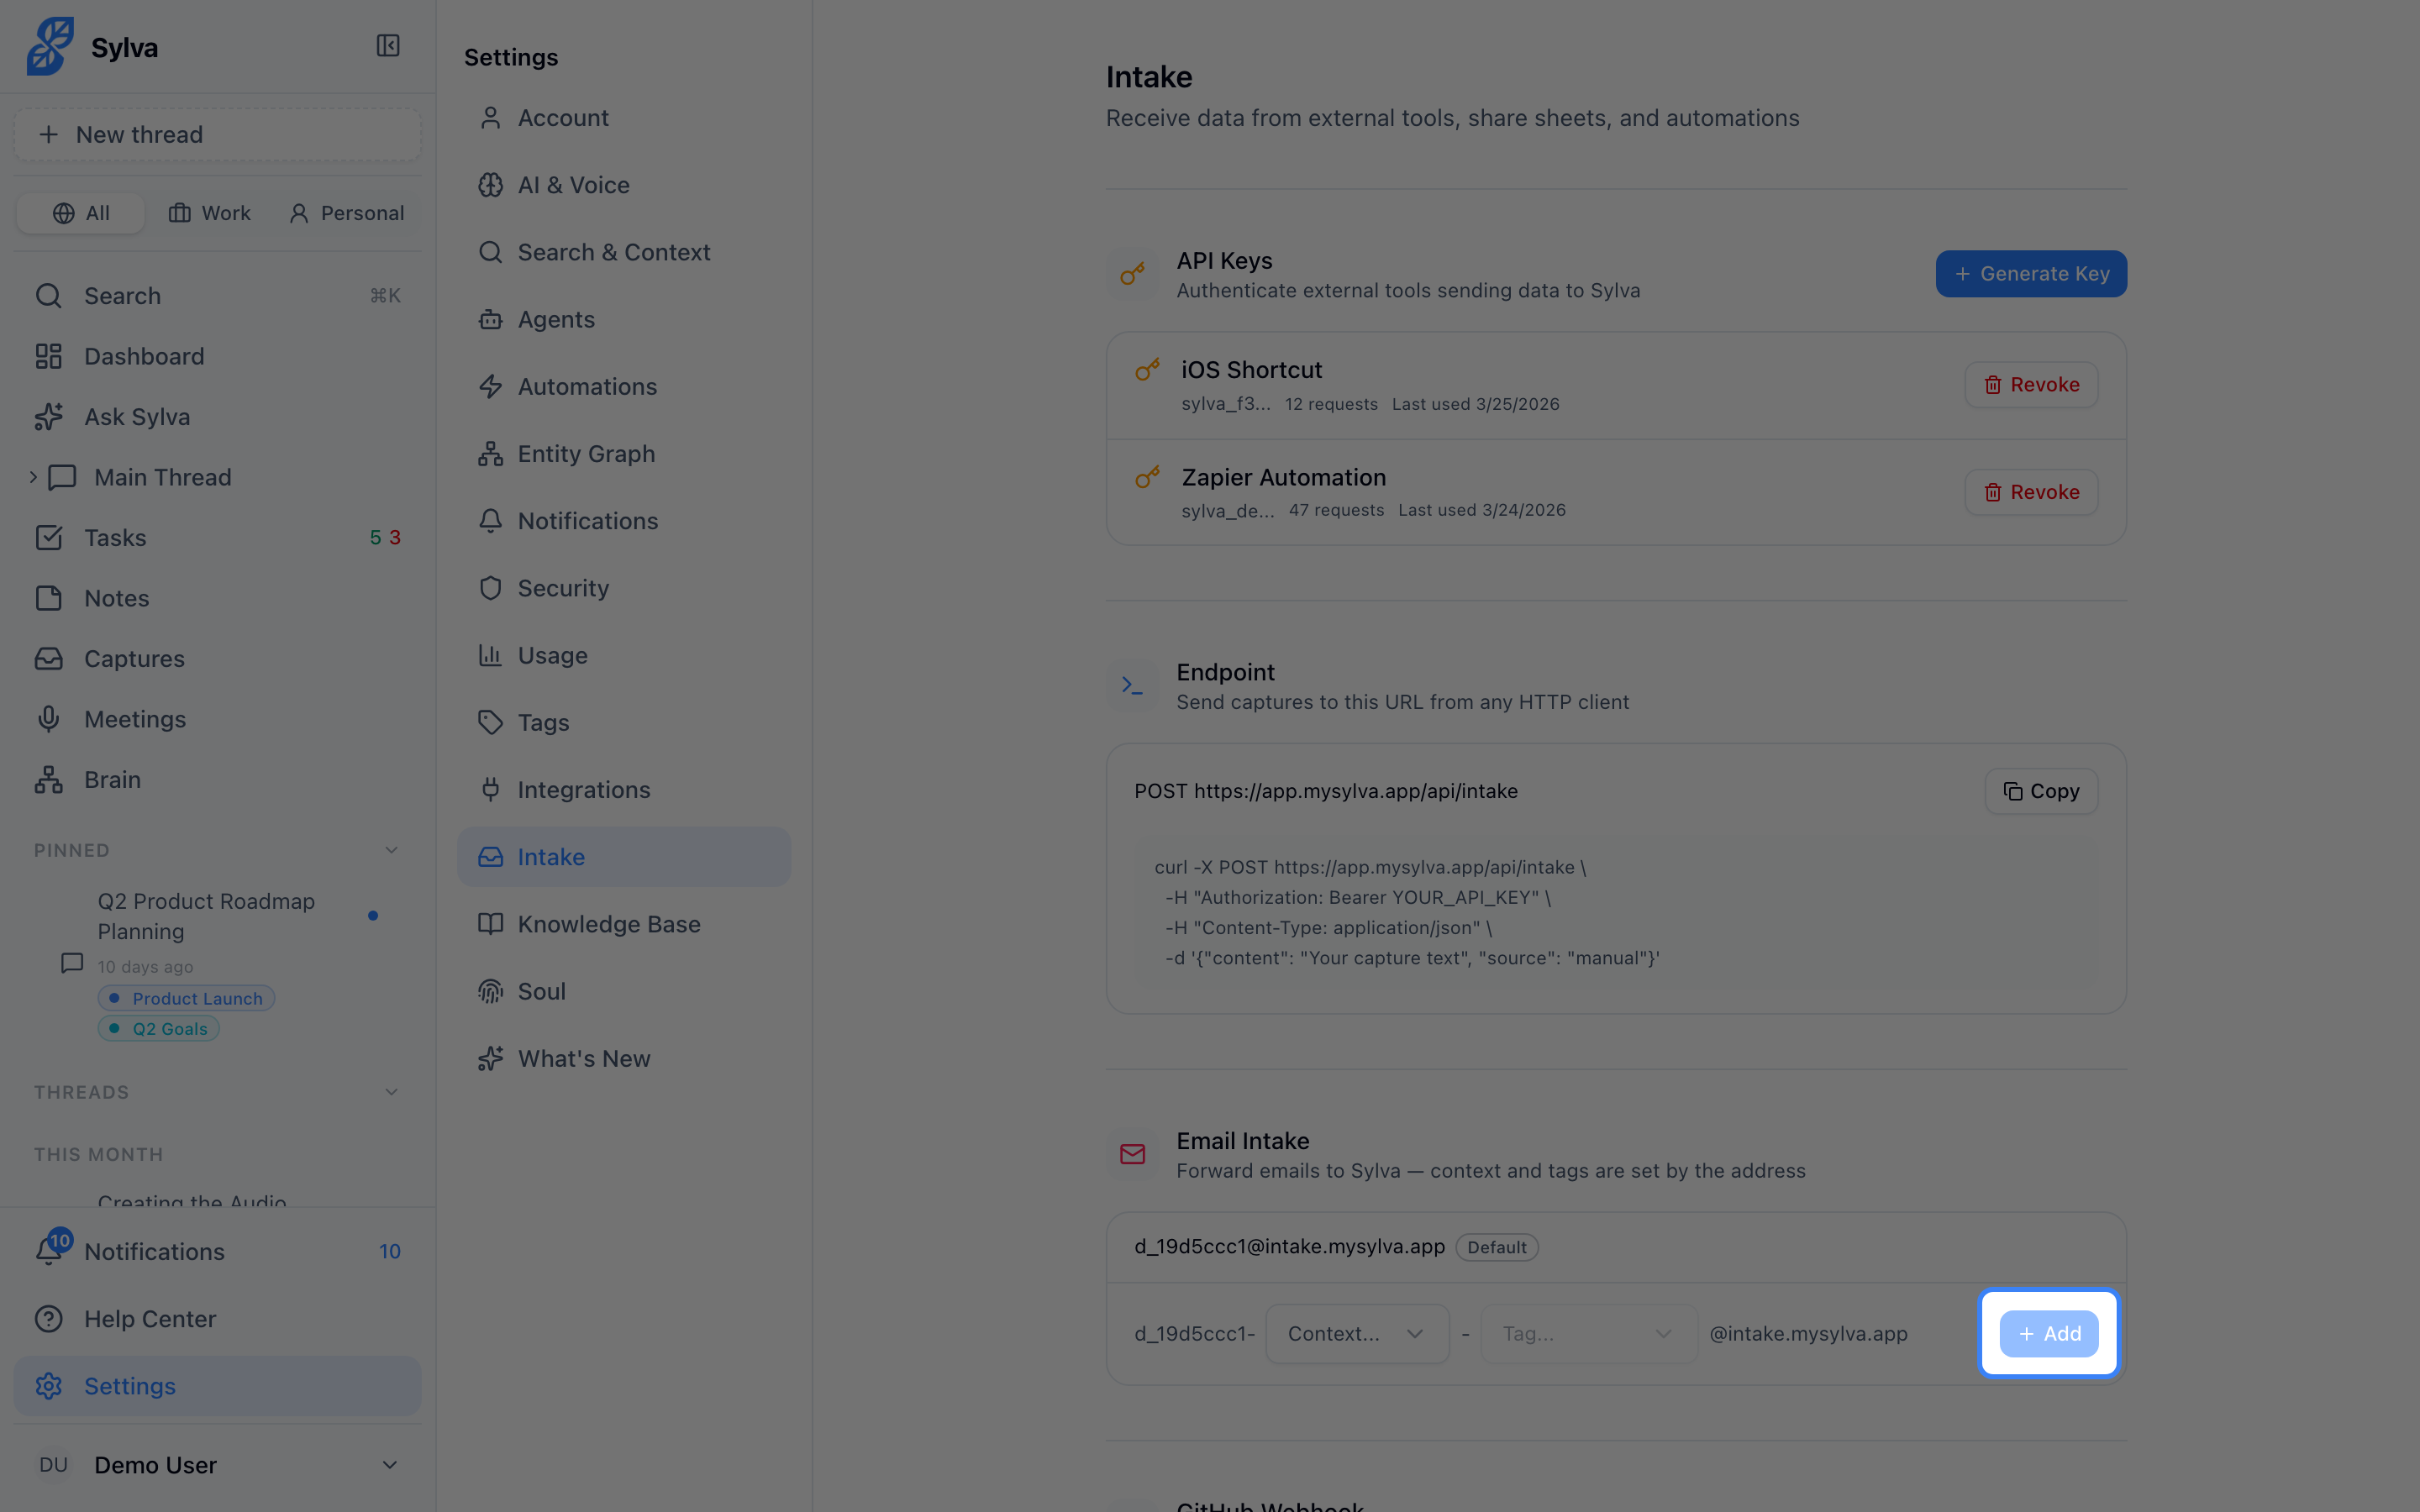
Sylva generates the new address instantly. You can create as many context-specific addresses as you need — one per context/tag combination.
Understanding the Address Format
Each address follows a predictable pattern built from your base identifier:
- Base (no context, no tag): j_9c8721b7@intake.mysylva.app
- Context only: j_9c8721b7-work@intake.mysylva.app
- Context + tag: j_9c8721b7-work-newsletter@intake.mysylva.app
The local part (everything before the @) is structured as base-context-tag. This means you can tell at a glance where a forwarded email will end up, and you can set up mail forwarding rules in Gmail, Outlook, or any email client that match specific senders or subjects to specific Sylva addresses.
Managing Your Addresses
All your intake addresses appear in a single list under the Email Intake section. Each entry shows:
- The full email address
- A badge indicating its context (Work or Personal) — the base address shows a Default badge instead
- A tag badge, if a tag was assigned
To delete a context-specific address, click the delete button that appears on hover next to that address. The address stops working immediately — any emails forwarded to it after deletion won't be captured.
The base address cannot be deleted. If you want to stop using email intake entirely, stop forwarding emails to your addresses — there's no additional toggle required.
Tips for Getting the Most Out of Email Intake
- Set up auto-forwarding rules in your email client to route specific senders or subject patterns to the right Sylva address. For example, forward all emails from your team's project alias to your -work-projectx address.
- Use the base address for quick captures when you're on mobile or don't want to think about categorization — you can always reassign context and tags later inside Sylva.
- Create a personal newsletter address like j_9c8721b7-personal-newsletter@intake.mysylva.app to keep subscriptions organized without cluttering your work captures.