Sylva's Knowledge Base is where everything you capture lives — notes, links, excerpts, and content from external tools — so your AI assistant has the full picture when you ask questions or need to find something later.
Quick Capture
The fastest way to get something into Sylva is the Quick Capture page. Open it from the app shortcut or navigate to Capture directly.
- Type or paste your content into the Content field (this is the only required field)
- Add a Title if you want — helpful for scanning your knowledge base later, but optional
- Click Add URL to attach a source link if the content came from a webpage
- Choose a context — Work or Personal — using the toggle at the bottom
- Click Save, or press Ctrl+Enter (⌘+Enter on Mac) to save without reaching for the mouse
After saving, the form resets so you can capture the next thing immediately.

Sharing into Sylva
On mobile, you can send content to Sylva from any app that supports your OS share sheet. When you tap Share in a browser, note-taking app, or messaging app and choose Sylva, the title, text, and URL are pre-filled on the Quick Capture page. Review, pick a context, and save.
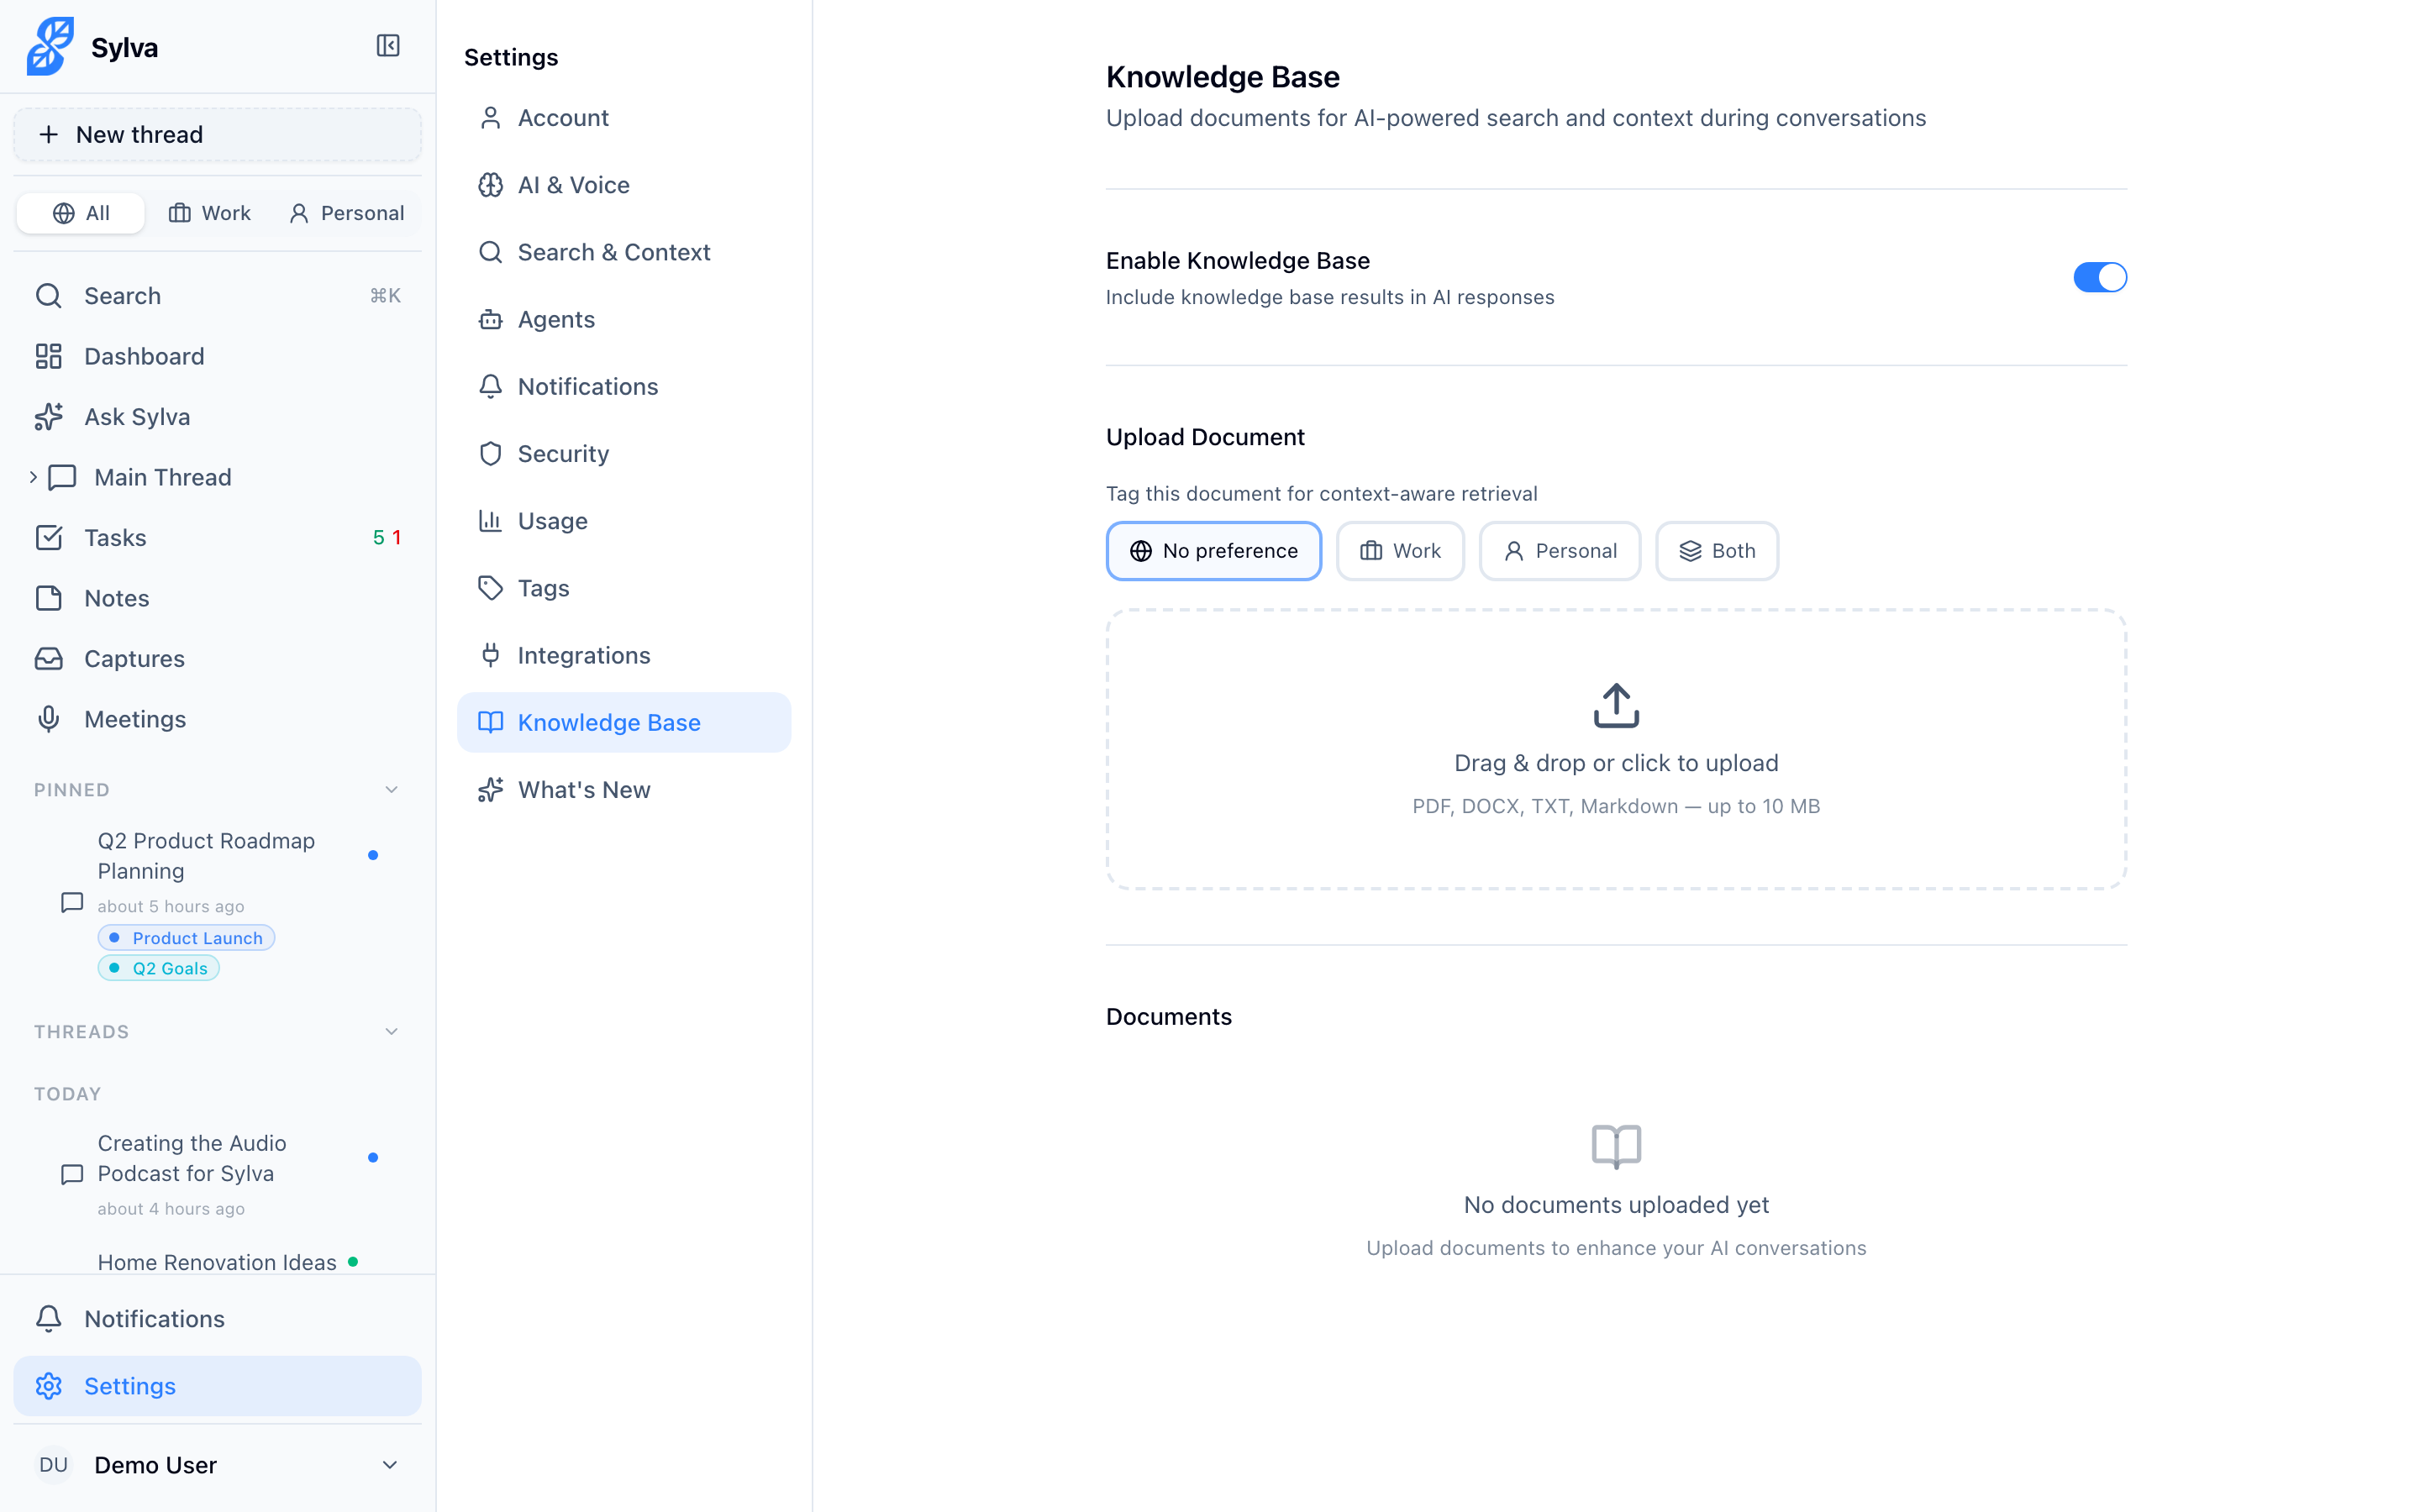
Browsing Your Knowledge Base
Everything you capture — manually, from conversations, via the Chrome Extension, or through the API — appears on the Knowledge Base page. Each entry shows its source, title, context, and when it was captured. Sylva's AI indexes this content automatically, so it surfaces in search results and can inform your assistant's answers.
Intake API
The Intake API lets external tools and automations push content into your Knowledge Base programmatically. This is useful when you want to connect services that Sylva doesn't integrate with natively — CI/CD pipelines, CRM systems, internal tools, or custom scripts.
The API accepts batches of captures in a single request, so you can submit multiple items at once without making repeated calls.

Creating and Managing API Keys
You need an API key to authenticate with the Intake API. Generate one from Settings > Admin.
- Open Settings > Admin and scroll to the API Keys section
- Click Create API Key
- Give the key a descriptive name — something like "Zapier integration" or "CRM webhook" — so you can identify it later
- Copy the key immediately. Sylva shows it only once; after you dismiss the dialog, the full key is no longer retrievable

To revoke a key, find it in the API Keys list and click Revoke. Revocation is instant — any request using that key will be rejected immediately. Create a new key before revoking an old one if you need to rotate credentials without downtime.
Using the API
Send captures to the REST endpoint with a POST request. Authenticate by including your API key in the Authorization header as a Bearer token.
Single capture:
bash
curl -X POST https://app.sylva.ai/api/captures
-H "Authorization: Bearer YOUR_API_KEY"
-H "Content-Type: application/json"
-d '{
"captures": [
{
"source": "crm",
"title": "Deal update — Acme Corp",
"content": "Acme moved to negotiation stage. Contract value $48k.",
"source_url": "https://crm.example.com/deals/12345",
"context": "work",
"captured_at": "2025-01-15T09:30:00Z"
}
]
}'
Batch capture (multiple items):
curl -X POST https://app.sylva.ai/api/captures \
  -H "Authorization: Bearer YOUR_API_KEY" \
  -H "Content-Type: application/json" \
  -d '{
    "captures": [
      {
        "source": "slack",
        "title": "Design review notes",
        "content": "Team agreed on the new nav layout. Ship by Friday.",
        "context": "work",
        "captured_at": "2025-01-15T10:00:00Z"
      },
      {
        "source": "email",
        "title": "Vendor pricing update",
        "content": "New pricing tier starts at $200/mo, effective Feb 1.",
        "context": "work",
        "captured_at": "2025-01-15T10:05:00Z"
      }
    ]
  }'
Each capture object supports these fields:
- source — where the content came from (e.g.,
"manual","slack","crm", or any string that makes sense for your integration) - title — optional label for the capture
- content — the actual text (required)
- source_url — optional link back to the original source
- context —
"work"or"personal" - captured_at — ISO 8601 timestamp; defaults to the current time if omitted
Webhook Integration Patterns
API keys work well as the authentication layer for webhook-driven workflows. Common patterns:
- Zapier / Make / n8n — Set up a webhook action that POSTs to
https://app.sylva.ai/api/captureswith your API key in the Authorization header. Trigger it from any event in your connected apps — a new Notion page, a tagged email, a closed support ticket - Incoming webhooks from SaaS tools — Many tools let you configure an outgoing webhook when something happens. Point that webhook at a lightweight middleware (a Zapier step, a Cloudflare Worker, or a small Lambda) that reformats the payload into Sylva's capture format and forwards it
- Scheduled batch syncs — Write a cron job or scheduled automation that queries another system, collects recent items, and submits them as a batch capture
Because each API key is named and tracked independently, you can create one key per integration. This makes it easy to see which integration is sending what — and to revoke a single integration's access without affecting the others.
Rate Limiting
The Intake API enforces rate limits to keep things stable. If you exceed the limit, the API returns a 429 Too Many Requests response. When this happens, wait and retry — the response headers include a Retry-After value telling you how long to wait.
For batch workflows, submit multiple captures in a single request rather than sending them one at a time. This is both faster and more efficient against the rate limit.
Intake Activity Log
Every API submission is logged. Check the Intake Activity section in Settings > Admin to see recent requests — which key was used, how many captures were submitted, and whether the request succeeded or failed. This is your first stop when troubleshooting an integration that isn't working as expected.
